Brake Upgrade Workflow

Hey guys,

I’ve bled my brakes before, but since I’m at 190k, my master cylinder is going, my pads are toast and my rotors are pretty old and need turning I thought I’d do a nearly full brake job and upgrade a bit while I’m at it.

Could you check the following components and workflow steps and see if I missed anything.

Cardone Rebuilt OEM Master Cylinder
Centric Premium Blank Rotors all around
CarboTech Bobcat/1521 pads all around
Goodridge Stainless Steel Brake Lines all around
ATE Super Blue Brake Fluid

Workflow:

  1. Bench bleed the master cylinder

  2. Install the master cylinder

  3. Install the new brake lines

  4. For each wheel (RR, LR, RF, LF)
    a) pull the wheel
    b) remove and secure calipers
    c) remove and install new rotor
    d) remove old pads, install new pads
    e) re-install caliper
    f) bleed brake line, keeping the master cylinder full and use a wood block under pedal to make sure it doesn’t bottom out and trash the master cylinder
    g) re-install wheel

  5. Bed-in procedure for Bobcat 1521 pads is:

    a. Brake from 60mph down to 30mph about 4-6 times.
    b. Then let your brakes cool for about 2-3 minutes while driving.
    c. Repeat step a.
    d. Allow the brake pads and discs to cool down to ambient temperature (about 30 minutes or more).

Any special tools or tricks would be much appreciated.

eris

Could get speed bleeders or that thing that pressurizes the BMC reservoir.
Lotta honda road racers say OEM-ish rear pads are fine and that anything stronger will give a rear-biased brake setup.
Could get the ABS 1" master cylinder.
With that many miles, its likely that one of your calipers has gone bad. Maybe pick up a reman caliper, and return it later if you dont need it.
Grease caliper slide pins while there.

Personally I would buy my master cylinder from the dealer, refuse to use any non OEM parts. I don’t have any experience w/ those specific rotors or pads so I won’t comment on them. Everything else looks good. :slight_smile:

The order of operations is only important for a couple things, you only need to do the bleeding corner by corner. Everything else I do simultaneously or maybe front then rear or vice versa.

  1. Car on jackstands, remove wheels
  2. Drain brake fluid as best you can
  3. Remove brake lines, calipers, and rotors (will be easiest in that order)
  4. Clean calipers, brackets, bolts…anything else you removed (optional)
  5. Clean and re-lube caliper slide pins (optional)
  6. Paint calipers and top hats of new rotors (optional)
  7. Install rotors, caliper brackets, calipers, and brake lines (easiest in that order)
  8. Bench bleed master cylinder and install (can pretty much be done at any point up until now)
  9. Bleed brakes
  10. Wipe all brake line fittings down to clean them. Pump the brakes. check for leaks visually and/or using a paper towel.
  11. Test drive for safety
  12. Bed brakes according to pad manufacturer’s specs. The procedure you posted is very conservative compared to what I’m used to… but if that’s what Carbotech says, then that’s what I’d do.

Only special tool I can think of is a 10mm flare wrench (also a 12mm if working on an ABS equipped car) and a c-clamp to push the caliper pistons back into the caliper to make room for the new pads. You may also want an impact screwdriver in order to remove the rotors.

Good luck, sounds like you’re gonna have an excellent feeling braking system, enjoy!

Thanks for recommendations

Colin and everyone else. Thanks for your suggestions.

I thought I’d leave some pics to the parts that some might not be familiar with…

Cardone Rebuilt OEM Master Cylinder: This is OEM. Cardone does a good job with the reman stuff I’ve gotten from them.

Centric Premium Blank Rotors all around: Centric and Powerslot are owned by the same company I think. They’ve gotten pretty decent reviews. Damn good prices over at Rockauto for them. Here’s the front rotor: part # 12040021

CarboTech Bobcat/1521 pads all around: The 1521s are a low-dust, low-noise street/performance ceramic pad. They are usually highly rated up with the best of the Hawk and EBC pads for street / autocross. They are a little harder to find then the Hawks or EBCs. Apparently they are nice to have if you also need a pad compatible with a race pad for track days. In that case you would use something like 1521s to get to the track and XP8s once you’re there.

Heres a link to their page describing the pad compounds they manufacture: http://www.ctbrakes.com/brake-compounds.html

The Goodridge SS lines and Super Blue brake fluid are pretty famous so I won’t bother with those.

I’d still get OEM instead of that Cardone. I realize it’s an OEM one they rebuilt… it’s the rebuilding part I don’t like. I don’t really trust any aftermarket stuff like that since I’ve had too many problems. Seen bad master cylinders, bad alternators, bad calipers… and tons of other stuff. Much of which started as OEM bits just rebuilt by another company.

Plus with a new OEM one you get a fresh reservoir, that alone make it worth it in my book. The plastic is white instead of the yellow/brown color of the old aged ones.

Those rotors look great though, that’s the first affordable blank I’ve seen with a coated top hat portion. I’ve become accustomed to just painting that so it doesn’t rust. Definitely something I need to remember!

If I’m not mistaken… isn’t the correct bleed sequence RR, LF, LR, RF? Correct me if I’m wrong brake gurus…

yep i think you are right sir ^^^^^^^

Well I better hope I’m right cuz that’s how I bled my brakes when I flushed the system recently. It’s been running and feeling fine for 3 weeks now :read:

Helms does call for a criss-cross bleeding pattern. However doing both rears then both fronts really won’t hurt anything. I’ve done it that way many times and the result was always brake lines free from all air.

Also, the whole “wood block under the pedal” thing. That’s generally a good idea but the primary reason for that is so that the “throw” on the MC doesn’t exceed normal use. The MC gets used to a short throw during everyday braking (how often do you brake hard enough to get the brakes to the floor?). Going past that limit can cause leaks on old seals. But going to the limit on a brand new MC is different. It doesn’t have a “throw” which it is used to yet, no “memory”. Or at least that is the reasoning which has been explained to me.

Master Cylinder blocking during bleeding

Also, the whole “wood block under the pedal” thing. That’s generally a good idea but the primary reason for that is so that the “throw” on the MC doesn’t exceed normal use.
… Going past that limit can cause leaks on old seals. But going to the limit on a brand new MC is different. It doesn’t have a “throw” which it is used to yet, no “memory”. Or at least that is the reasoning which has been explained to me.

Thanks for that explanation, Colin. It’s the first sensible one I’ve seen.

[QUOTE=Colin;2072431]
Only special tool I can think of is a 10mm flare wrench (also a 12mm if working on an ABS equipped car) and a c-clamp to push the caliper pistons back into the caliper to make room for the new pads. You may also want an impact screwdriver in order to remove the rotors.

Good luck, sounds like you’re gonna have an excellent feeling braking system, enjoy![/QUOTE]

Thanks. I picked up a reasonably priced flare wrench set from Sears. C-clamps are everywhere. I thought the impact wrench would be easy to find, but you have to decide if you want a pneumatic one ($200 at least for the tank, $120 for a 650 ft/lb wrench and big space consumer), or $300 for a DeWalt 18v portable battery powered version (330 ft/lbs torque, but probably chews batteries quick) or a corded version ($170 for a DeWalt 350 ft/lb).

I did the corded version.

You don’t need an impact wrench, you can use normal tools, but obviously an impact wrench is handy. We have a cheap pneumatic one and I rarely use it cause it sucks. I really need to invest in a high quality pneumatic one and maybe an impact ratchet as well.

In my above post I was referring to an “impact screwdriver” It’s a screwdriver which you hit with a hammer. It then provides much more force than a normal screwdriver used by hand. Often this tool is the only way besides an bolt extractor to remove the screws which hold the rotor in place.

Here’s a pic of what an impact screwdriver looks like, and should be under $30-$40:

Yep. Saw that one too, but I figured that a real impact wrench would have it’s uses over the long haul. $170 not too bad for that functionality.

Sorry, Colin. I missed part of the point there. Impact, when you’re working on screws :slight_smile:

Complete Brake Fluid Drain?

Colin,

I was double-checking the workflow on the brake job and was giving signficant thought to the phrase “drain brake fluid as best you can”.

I assuming you mean a full-blown drain. Everything from the master cylinder, all the way out the brake lines.

Which makes sense to me actually, considering that I’m replacing the master cylinder, installing stainless steel brake lines, changing fluid over to Super Blue, and replacing the hubs, pads etc.

I saw some articles that recommend you use a syringe to remove as much fluid from the master cylinder as possible before proceeding. I assume that’s to minimize the mess.

I also saw a lot of articles saying that you should never completely drain the the brake system, but all of them were talking about getting air in the system, or damage to the master cylinder from sludge etc. No problem there since I’m replacing it and who cares about air since I’m going to completely replace and bleed it anyway. Just double checking really.

eris

You won’t be able to get very drop out, and that’s fine. You can loosen a bleed bolt and pump the brakes to get most of the fluid out of the master cylinder. But you’ll still have fluid in the lines. You can disconnect the lines and let them sit and each drain into a container. Or you can just start unbolting the lines for removal and attempt to catch as much fluid as possible with rags or plastic containers then quickly try to re-install the new lines and get it bolted back up… Just depends on what you want to do and how much time you have.

When refilling the system I start off by putting new fluid in the MC, start bleeding the brakes as usual, you’ll obviously have tons of bubbles. You’re gonna need to do each corner more than once. Just go around the car a few times and more and more bubbles will go away.

The first round of bleeding will have part new fluid and part old fluid. After you get that out of the system I throw it away and only add fresh fluid to the MC. After you’ve done some more bleeding and you now have all fresh fluid in the system I will re-use fluid after it’s bled out. Sometimes this is necessary if you’ve having a hard time getting all the air out of the lines and need to repeatedly refill the MC.

Hopefully that makes some sense.

Newb Brake Job, Day 1

So I finally got all of the parts and decided to have at it. The following are some notes from Day 1. I thought I’d post these notes while it’s still fresh in my mind so it might help some other newbs.

As a recap, I’m replacing everything but the calipers (though some people have recommended that I just get new ones … and I might yet).

Here’s the list:

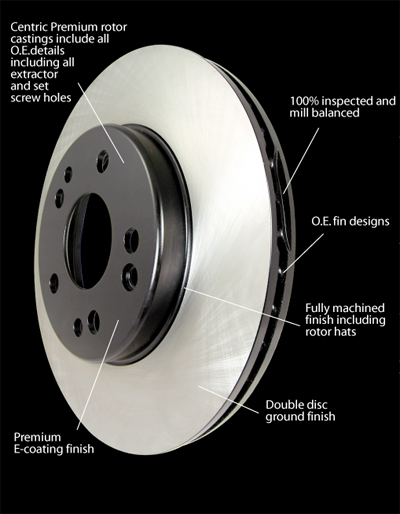
New Rotors: Front and rear Centric rotors (blanks, slightly upgraded)
New Pads: CarboTech 1521 Street Pads
New Hoses: Goodridge Stainless Steel (front and back)
New Fluid: ATE Super Blue

I’ll comment on the workflow, point by point…

  1. Car on jackstands, remove wheels

This is pretty basic really though I found myself annoyed because I couldn’t find my jack and jackstands after my most recent move. I picked up some cheap Chinese floor jack + 2 jackstand deal at Advanced for $40. I wouldn’t say it was a total waste of money, but if you want to jack up the car from the front or rear jack point to place the jack stands I wouldn’t do it again.

The damn floor jack couldn’t jack up the Teg high enough from either the front or rear jack points to place its own jack stands. After that I read an article on floor jacks on the net. Turns out almost all floor jacks are now made cheaply in China and aren’t meant to last more than 10 up/down cycles before their seals leak.

The only jack still made in the US runs about $600. You can get some good Japanese jacks for a little over half that from Norco. Norco also sells a version of their jack made in China, but strictly according to their design and seals. If you look around you can find it for about $215.

Anyway, since I didn’t want to wait another week for a good jack I used the floor jack to jack the car on its corners right near the jack points. I don’t like doing that because I often see that technique crumples the steel next to the jack point. Anyway, I was careful and everything was okay.

  1. Drain brake fluid as best you can

There are a lot of different ways you can do this, but the following worked suprisingly well for me…

(drain master cylinder)
– get one of those water bottles made for cyclists that has a pop open valve at the top
– buy some clear vinyl tubing (3/8" at Home Depot I think) to drain the fluid with
– drill a hole in the top of the bottle and feed the tubing all the way to the bottom
– take off the master cylinder cap
– open the bottle valve, squeeze it all the way, close the valve and put the end of the tubing into the master cylinder reservoir.
– release the bottle and it will suck a large amount of fluid from the master cylinder

(drain lines)
– after removing the wheels, setup shop towels down under each wheel while draining. Place a drain pan under each wheel while working there.
– remove the bleed cap and crack open the bleed valve just a little. these can be stuck tight so I always use a socket wrench. don’t open them all the way or you’ll be spilling fluid on the floor
– attach the bleed tube and bottle and open the bottle valve
– squeeze the bottle, close the bottle valve and set it down
– using the box wrench open up the bleed valve until you get maximum fluid drain
– repeat for all wheels. you’ll get most of it out.

  1. Remove brake hoses, calipers, and rotors (will be easiest in that order)

(brake hose removal)
Here is what I did with only a couple issues…
– if your wheel well is really dirty, clean it up a bit to make it easier.
– if you have any corrosion on the bolts/parts put some break free or PB catalyzer on the hose/line interface, hose clip, retainer bolts and banjo bolt (where it connects to the caliper).
– while you’re at it, put some more on the caliper bolts and caliper mount bolts
– give it a while to sink in
– start at the top of the brake hose at the interface where it mates with the steel brake line
– use a 10mm flare wrench to open the joint
– unscrew it by hand
– there’s a steel clip at that interface that needs to be removed and it can be a pain. depending on the level of crud, corrosion and the phase of the moon a needle nose pliers can sometimes be used to remove it. when you grab it, slide it back and forth to break it free of the old crap. that seems to help.
– if you get a sticky retainer clip, try using one of the combination needle nose/vice grip things which will help with yanking it out. apparently there are special needle nose pliers which are made especially for pulling clips like that out towards you. if you have one, you’re in luck.
– the rest of the hose is easy to disconnect, just loosen the bolts with a socket wrench. you might want to write down the exact location of the mounting clips.
– the last bolt, the banjo bolt is connected directly to the caliper. crack it open with a socket and back it out by hand. be careful. you’ll notice as it comes out it starts leaking brake fluid even though you just drained the fluid. this is one of the areas where the remaining brake fluid collects so make sure you have your drip pan underneath while doing it. when the banjo bolt comes free you’ll probably get several ounces of brake fluid pouring out.

(caliper removal)

– You’ll have two sets of caliper bolts to remove. Both sets are on the wheel well side of the caliper. One set is on the caliper itself and the second is on the caliper mount. The two bolts on the caliper itself are on the forward part of the caliper, one high and one low. They aren’t usually too hard to remove since you’ve already applied PB Catalyst.
The second set are on the caliper mount – the part the caliper rests on and where the pads join the rotor. They are just rearward of the caliper bolts and can really be a pain to remove. If you have a small pneumatic impact wrench they might come off fine, otherwise I find that “hillbilly impact” worked well for me. Just put an open ended wrench on the damn bolt and smack it counterclockwise (from the bolts viewpoint). Even though hitting the far end of the wrench would theoretically apply the largest torque impulse to the bolt, I find that there’s too much “slop” out there to really get good torque transfer. I hold the wrench at the end and smack it right around the center. My bolts came loose after about 2 - 3 good smacks with a ball peen hammer.

Much more fun to come, including…

  1. Clean calipers, brackets, bolts…anything else you removed (optional)
  2. Clean and re-lube caliper slide pins (optional)
  3. Paint calipers and top hats of new rotors (optional)
  4. Install rotors, caliper brackets, calipers, and brake lines (easiest in that order)
  5. Bench bleed master cylinder and install (can pretty much be done at any point up until now)
  6. Bleed brakes
  7. Wipe all brake line fittings down to clean them. Pump the brakes. check for leaks visually and/or using a paper towel.
  8. Test drive for safety
  9. Bed brakes according to pad manufacturer’s specs.

Have a good weekend…

eris

Newb Brake Job, Day 1

(sorry accidental double post – where’s delete?)

AWESOME POST! thank you so much

Gonna do my brakes this weekend. Replacing Rotors, Pads, and Fluids.

running Brembo Blanks and Premium O.E. Nissin Pads (f & r) with ATE DOT4.

Was wondering OP, what are you using to lube the calipers/pins?

Rotors, Pads and Calipers Done, and now…

Okay, the continuing saga of the newbie brake job.

To answer the previous questions about lubricant: I first used some Permatex brake lubricant that I got at Advanced. After the first wheel I switched to Sil-Glide. They are both high-temp silicone lubricant meant for brake caliper slide pistons and as a buffer lubricant on the pad shims to stop noise. I haven’t had a chance to performance benchmark them against each other though I find I favor the Sil-Glyde a little bit. Mostly because: (a) It’s not quite so viscous and applies better than the Permatex and (b) the Permatex is a dark, translucent blue color which under marginal lighting looks a lot like old, dirty grease. The Sil-Glyde is similar in appearance to petroleum jelly so it’s obvious what’s dirt and what’s not.

More info later after I’ve bench bled the master cylinder and installed it.