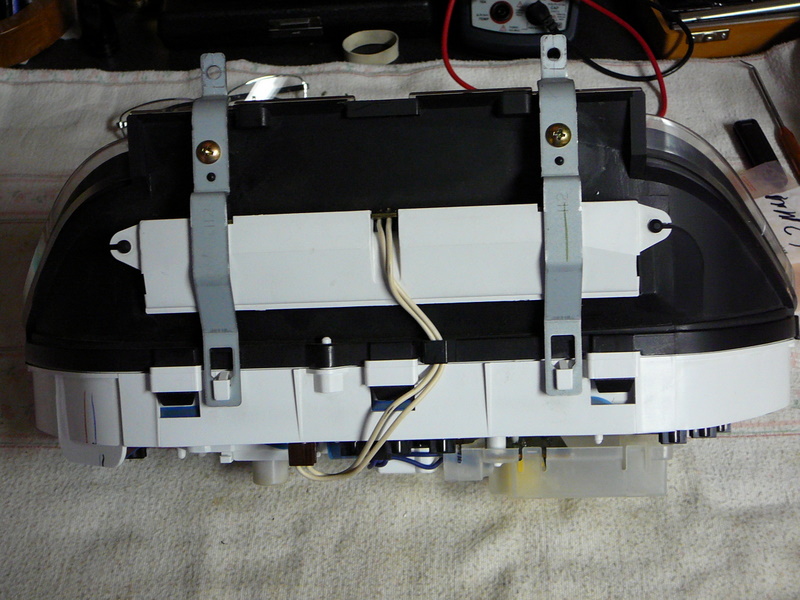
I searched and didn’t find any threads that discussed this in detail. This deals with replacing or swapping individual gauges within the cluster in our cars. I recently converted my car from automatic to manual and didn’t want the automatic cluster but didn’t want to give up the relatively low kilometers on my car. I purchased a GSR cluster and was prepared to accept the kilometers on it and just keep track of the difference but as it turned out, the speedometer in the GSR cluster was not working properly. However, I really did want the 9000 RPM tach in the GSR cluster. When I looked at the clusters closely there was little difference in the two of them, so I decided to take the GSR cluster apart. You can easily do that by first removing the metal brackets on top of cluster and releasing the tabs that hold the clear plastic face onto the white back. There are three on top and three on the bottom. Once released you can separate the two pieces.
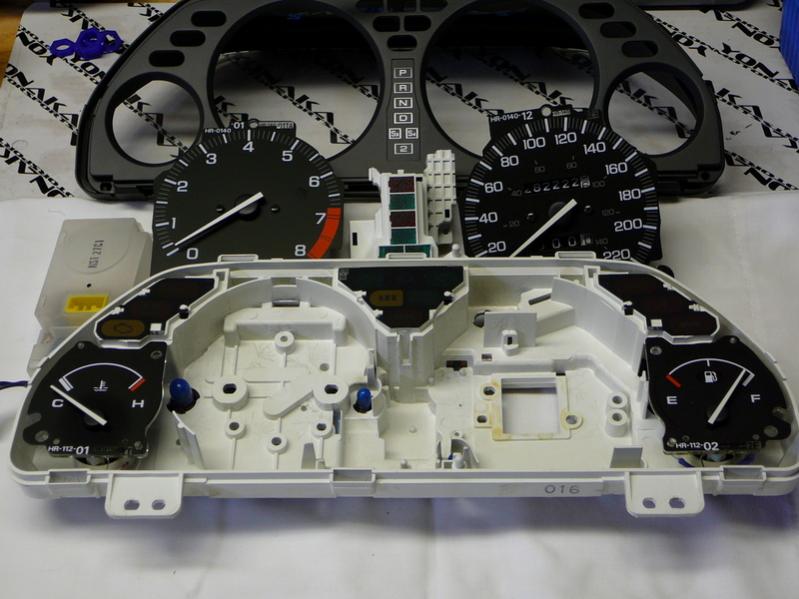
Put the clear plastic face aside and focus on the gauges. Remove the black face plate that rests on top of the gauges. You can see that if you have an automatic, the shift lights are contained on and under the plate and if you have a manual, the face plate is just holes in the correct places. With the face plate removed, you can see that there are four independent gauges.
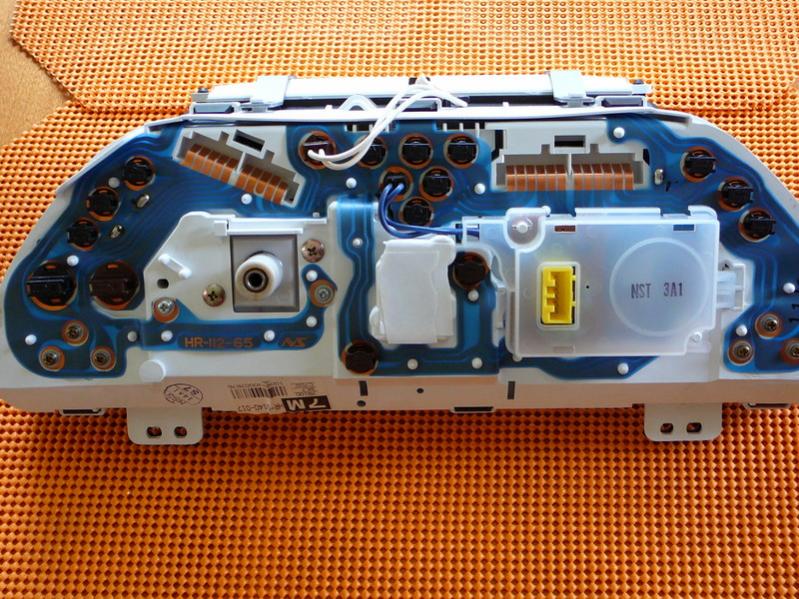
They are held in the white plastic cluster base by small screws in the back of the cluster base. The first thing to do is make a mental note of exactly where the needles are pointing. You have to be very careful not to damage the needles or allow them to move from their original position. Depending on your need you will be able to remove each gauge individually by removing the screws on the back of the cluster that correspond to the gauge to be removed. Looking at the back of the white cluster base, you will also see a translucent plastic piece with a yellow connector. That is for the cruise control light in the dash if your car has it. The tachometer screws are under there. That plastic piece can be removed by disengaging two places where it latches into the cluster base and a third place where it fits on a post. You can just pull it off the post after disengaging the two latches and then remove the light bulb at the end of the wire. In the center of the back of the cluster will either be another connector, if you have an automatic, or nothing but a bump in the plastic with a flat surface as seen in the picture. When you remove a gauge you do not have to be concerned about wires or connectors from the gauge to the cluster. Again if you look at the back of the cluster you will see that many of the screws actually are a connection on the circuit foil. Those are the connections so when you remove the screws, the gauge will just fall out. The electronics for each gauge is built into the gauge so for example its a simple one-for-one replacement to swap out the 8000 RPM tach for the GSR 9000 RPM tach. Similarly if you want to retain your speedometer you would swap out that.
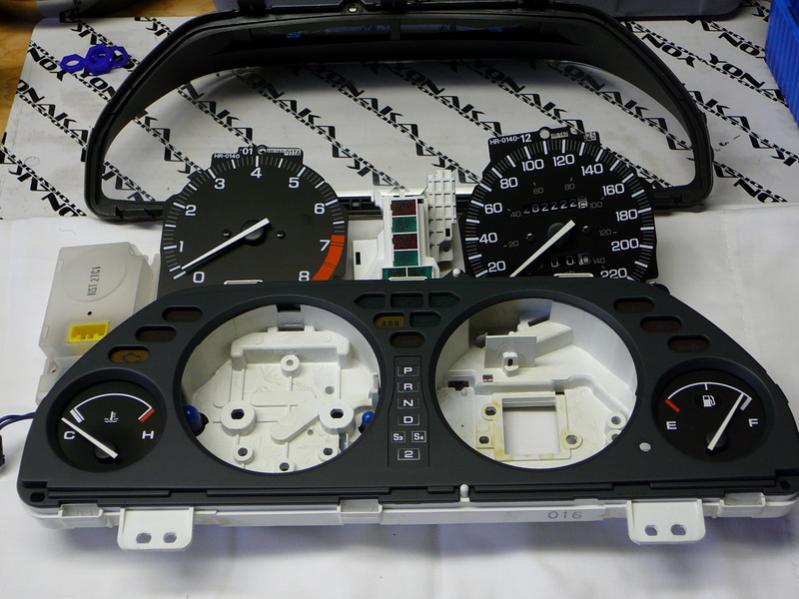
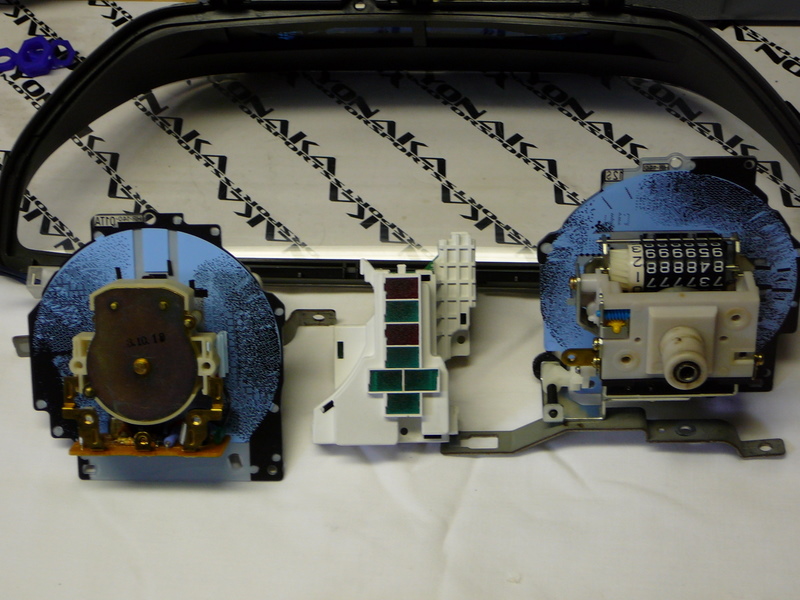
In the last picture you are looking at the back of the tach, the back of the speedometer and in the middle the component that snaps into the center of the cluster to provide the shift lights for the automatic. The space in the cluster is there for all clusters but is empty for a 5 speed. I removed it from my cluster.
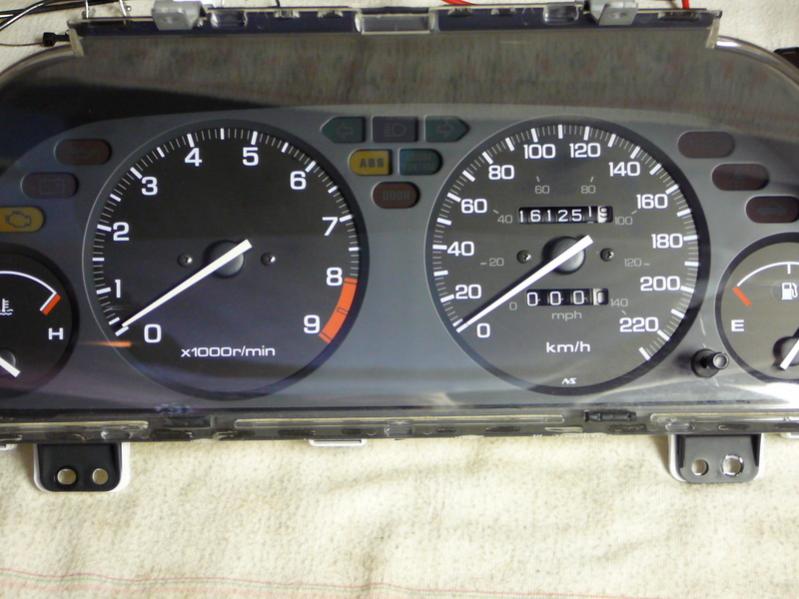
The last picture is of my actual cluster when complete. It is my automatic cluster with the 9000 RPM tach inserted and the 5 speed black face plate inserted and the shift light component removed.
Enjoy:)
Roger